At the tee ball level, players aged 4 through 8 begin to learn how to hit, throw, catch, run and field. As they develop their throwing and running skills, they move to the outfield and attempt different player tasks, such as throwing into the infield, cutting off runners and learning how to catch fly balls. We’ve put together 10 Tee Ball Outfield Drills for coaches to do with their young players. You’ll find that the repetition of these drills will start yielding positive results in a short time.
Defensive Rotation Drill
This drill is specially designed for beginner tee ball players and helps familiarize them with the layout of the outfield. It also helps them to become familiar with the infield including the pitcher’s mound.
For this drill, coaches need to use a baseball field. With the whole team on the field, divide it into three zones. Assign a coach to each zone. Place a cone to mark every position on the field (9 cones in all).
- The first zone has players at first base, second base, and right field.
- The 2nd zone has players at left center field, right center and at the pitching position.
- The 3rd zone is comprised of the shortstop position, third base and left field. Players assume these positions.
The players rotate between batters, so each player has a chance to play all positions in the infield and the outfield.
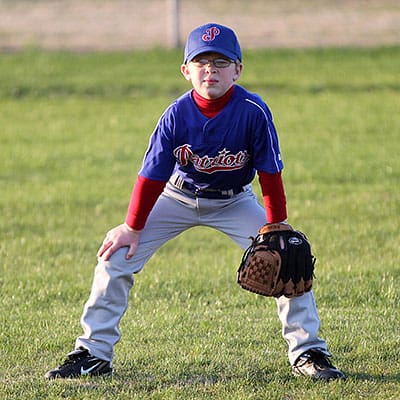
As each player comes to bat, make sure each tee ball player is in the ready position. Outfielders stand slightly bent, their heads forward. Infield players assume the athletic stance also, a slight crouch, knees bent, their heads forward, as their weight moves to the balls of their feet.
Make sure each player gets in the ready position for each batter.
Catchers remain as catchers during the entire drill, so they don’t have to change out of their equipment.
Left, Center and Right Field Location Drill
This is a running drill to help kids become familiar with the three outfield boundaries while improving their speed and agility.
For the drill, coaches will need three cones and the use of a baseball field. Place a cone in the center of each outfield position, one in left, one in center, and one in right field.
Begin with all the team’s players in left field at the cone. Have them wear their gloves even though no throwing or catching is involved, so they learn to move quickly from place to place wearing the heavier gloves.
Begin all players in right field at the cone. Call out “Center Field” and all players run as one to the cone in the center. The first one to get there wins.
Next, the coach yells “right field” and all the players run back to right. The first one to get back wins.
Keep making them go from right to center, center to right to reinforce the distinct location of the two different positions.
Now get them moving from center to left field. Call plays quickly to trick players and get them off their guard, so they stay on their toes.
Hit the Bucket Outfield Drill
Part of playing an outfield position involves throwing long distances with accuracy. After young players make a catch, they’ll throw the ball to a small target that’s far away from them during games. It’s good to start early, perhaps not throwing long distances, but at least throwing with precision.
For this drill, you’ll need a bucket and tee balls, and the outfield of a baseball field. Place the bucket on the grass. Separate the team in half and have each set up in a circle around the bucket about five to seven feet away.
The object is for players to get the ball inside the bucket. Each player has a tee ball. One player at a time throws to the bucket. Go around in the circle, and when one contacts the bucket on the outside, it counts as one out for the whole group.
When a player gets the ball in the bucket, it counts as three outs for the group. Once the whole team each makes three outs (each gets the ball in the bucket), then everyone wins.
After everyone throws the ball 2 or 3 times, gather up the tee balls and call a timeout. Then, redistribute the balls and start again until everyone gets the ball inside the bucket.
If the bucket drill is repeated at every practice, after a time the players will get more accurate in their throws. Simply make the circle larger increase the distance between the players and the bucket.
Soft Hands Outfield Drill
This is yet another throwing accuracy drill, except this time the throw is made to another player. Making your drills increasingly challenging and doing it gradually really helps young players improve faster because each drill builds on the previous one.
Set up a square with 4 players about 5 to 7 feet apart from each other in the outfield. For a full team, set up two squares. Each square should have from 4 to 5 players in it, and each group should have one tee ball.
The first player with the tee ball makes an underhand toss to the player to their left. The thrower locks his elbow, moving the foot on the side of his throwing arm forward. The catcher makes his glove the target of the throw.
The thrower tries to hit the target. The catcher, in turn, throws to the next player in the square. The players should try to move the ball from one to the other as quickly as possible.
Coaches can time the drill for competition between groups. For example, when the ball makes three circuits around the square first, then that group wins.
It might be a good idea to lengthen the distance between throwers and catchers in the square as long as they are making the underhand throw with the correct toss and foot movement. The idea is that the thrower is accurate and hits the target glove in the catcher’s hand. Increasing the distance is a prelude to making longer outfield throws.
Target Accuracy Drill
This is both a throwing and catching drill, emphasizing accurate throwing. This is an overhand throwing drill, one that, if repeated, over time will lead to better throwing accuracy.
Place players in two lines facing each other about 7 feet apart. The target goal is for the player throwing to the ball to hit the center of his target, which is the center of the catcher’s body at his chest.
- The player throws to his partner.
- When the catcher hits the center of the target of the player he throws to, he gets 3 points.
- When he throws outside the target, he gets 2 points.
- Further outside the target, he gets 1 point.
The catcher throws back to his partner, and the same scoring system is used. The first team of two players to score 21 points wins.
 Increase the distance between the thrower and the catcher to 12 feet (or 12 paces) at the next practice. Although this is tee ball, it’s always a good idea to put a player’s skill to the test. Make young players try things they aren’t normally expected to be able to perform. This is referred to as the “outlier.”
Although the goal is to score 21 points to win, the drill is really teaching players to throw for longer distances and to throw harder with accuracy. Keep increasing the distance between players and challenge throwers to reach longer distances in their throws.
Hand to Eye Coordination Drill
This drill tests and helps improve the reflexes of your tee ball players. They learn to react quickly as they must throw and receive a tee ball almost simultaneously.
Players pair up into teams of two each. Each player holds a tee ball in his hand for this drill. They do not use their gloves. Players initially stand about 10 feet apart. The coach yells “Go”, and players throw underhand to each other at the same time and attempt to catch the ball.
Players catch with their left hand and throw with their right. When the ball is caught, the catcher will flip the ball from his left hand over to his right, behind his back. Then they throw, again at the same time, and repeat.
When throwing, the player steps into the toss, throwing underhanded and extending their right foot out. Think of throwing a bowling ball down the alley to the pins, except without the footwork. Here, it’s one step forward followed by the underhand toss.
Repeat the throws back and forth. If one player drops the ball, the other waits to throw until he is ready. Extending the distance between the players is also advised. Like every tee ball drill, turn the drill into a fun competition. For example, each time the pair of players makes the circuit (both players throwing and catching the ball successfully), they get two points. The first team to get 12 points wins.
Fly Ball Catch Outfielder Drill
One of the most difficult skills for a tee ball player to develop is catching fly balls. In the first place, youth players have a built-in fear of getting hurt and tend to shield their faces with their gloves when the ball approaches.
This is why it’s important to use tee balls during outfielder drills. Even a tennis ball is great for catching drills. Overcoming their reluctance to catch a fly ball takes time.
Perform this drill with three players in the outfield. Using a tennis ball, throw first to one player at a time. Don’t throw too high into the air at first; the arc should be smaller. As time goes on and players begin to catch the ball and not block it, throw in higher arcs to each player one at a time.
Next, throw the ball between outfielders, and have them use signals such as “I got it,” or “Mine”. Throw the ball between 5 to 10 minutes.
The drill should be progressive so that at the next practice, a tennis ball is thrown behind the payer for his o run and catch. Throws should first be right at the player until he overcomes the fear of the ball, then in front of him to run up to, and following that, behind him, then to his left and right, and finally when he calls for the ball when it is between him and another outfielder.
Another strategy is for the player to kneel first and have the coach toss a tennis ball. Once he has confidence he can try catching the ball standing up.
The last step is to catch and release the ball. Here the player catches the ball and then quickly throws it back to the coach, or another player.
Around the Horn Outfield Drill
Once fielding is accomplished, coaches can start their outfielders throwing to each other. Try using a tee ball for throwing around the horn.
First, have players all gather in left field in a triangle about 10 feet apart. Each player throws to the player on his right. Every three rounds of throws around the triangle, each player takes two steps back, remaining in a triangular formation.
After another three sets of throws around, the players take another two steps back. The objective is to have the players end up in their zones in left field, center field, and right field.
Blocking the Sun Outfield Drill
This drill is designed to help players catch a ball that is in the sun. The drill is performed in the outfield. Players partner up into teams of two.
For this drill, use soft tee balls. The thrower and catcher stand about 10 to 15 feet apart. The players are placed in such a way that the sun is directly behind one of them.
The player with the sun on his back will throw to the other player. He will throw a fly ball that arches into the air and is obscured by the sun. The sun becomes a factor for the player catching the ball.
The catcher uses his glove to protect his eyes and to field the ball. He should use the upper part of his glove to block the sun and look through the lower part and underneath the glove to keep track of the ball in the air and to catch it.
This is a more advanced tee ball drill and should last for about 5 minutes. As one player catches, they reverse position and this player who caught the ball now throws to the other player.
You can make a game of it. The first team to catch three fly balls total wins.
Ground Ball Outfield Drill
This drill teaches young players to get into the proper fielding and throwing positions in order to field ground balls and release them quickly.
This drill will also include your infield players, not only to catch the ball thrown from the outfield but also because some of your infielders may end up playing the outfield at some point.
Tee Ball is not only a time to teach the important remedial skills players will use throughout their baseball careers. It’s also the time when player positions begin to be assigned. One tee ball player may be great playing the role of catcher and so is given that position to play more often. Another may have a great throwing arm and will start practicing pitching skills.
The drill should begin with a footwork demonstration, including the proper way to approach a ground ball. Players need to approach in a straight line, and during these drills, they learn to place their glove.
Players should take their first step with their foot closest to the ball. Tell them that every time the ball is hit, they should take two steps in the direction of the ball.
For this drill, the coach rolls a ball to an outfielder. The player gets into fielding position, retrieves the ball and throws it to the infield.
- Player bends his knees and gets in front of the ball. His body is situated on either side of the ball so that it rolls to his middle.
- Once in his glove, the player steps with his throwing foot forward.
- He follows with the foot on the side of his glove (for right-handers, it’s his left glove and left foot.)
- He stands and gets into throwing position.
- He throws the ball to the infielder.
Make sure players know that their body acts to black the ball in the event there is a bad hop.
Teaching outfielders to field ground balls prepares them in the even they take an infield position. All nine field positions are a toss up at the beginning since players are at the stage of discovering their abilities. Some may catch fly balls better than others and end up playing an important outfield position. Others have quick reflexes and field ground balls well and may become future shortstops. Coaches should be teaching players the skill set required for each position.


