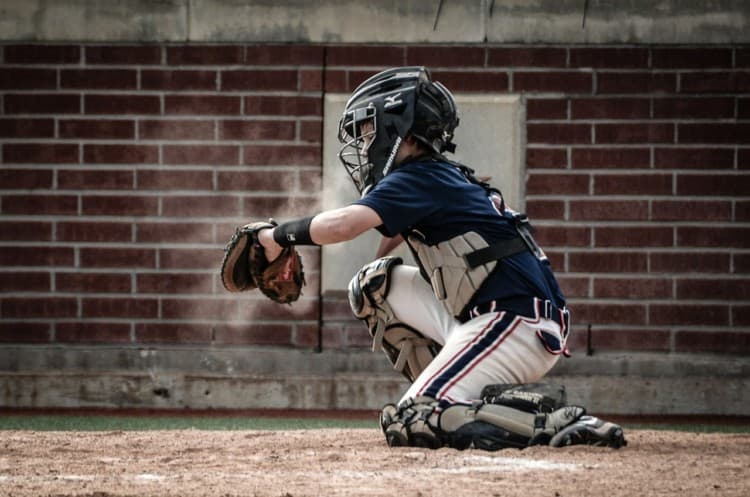
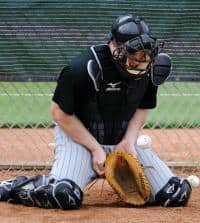
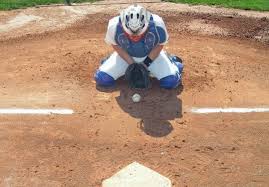
One of the most challenging positions in baseball belongs to the catcher. It is both physically and mentally demanding. Catchers are in deep squats through 7 innings while they give the pitcher signals and keep track of the opposition’s base runners. Nothing helps young little league catchers improve their play as much as youth catcher drills. Assembled here are 10 youth catcher drills designed to keep catchers playing at a high level.
Youth catcher drills are designed to help all catcher levels strengthen throwing arms, gain strength in the legs, help conceal pitching signals, and test understanding of his key role in the game. These drills require the coach, members of the team and the pitcher.
Wild Pitch Catcher Drill – Runner on 3rd Base
It’s almost impossible at times for catchers to block a wild pitch with their bodies no matter how well they’ve closed up the
points where balls can pass through. In this drill performed during team practice, a runner stands at third base and the pitcher is on the mound.
The pitcher intentionally throws wild so the ball goes behind the catcher near the backstop. Here are the steps the catcher takes:
- Catcher immediately locates the ball behind him (pulls off his face guard).
- Once located, catcher approaches the ball on the throwing arm side of his body.
- He should also practice approaching the ball by sliding towards it on his knees.
- Pitcher covers home plate.
- Catcher picks ball up and, on his knees, throws to the pitcher at home.
Catcher Fielding Popup Drill
This is another drill that has the catcher running through a play that is similar to a situation during a game. Encourage repeating the Catcher Fielding Popup Drill to make it easier for your catcher to get under and catch fly balls. During the game, catchers need to be aware of where runners are on base and be able to react quickly after catching the ball.
When a high fly ball is hit and the catcher calls it, runners stay on base until the ball is caught or dropped. A good clean catch and release allows the catcher to catch a base runner off guard and throw him out.
On the other hand, if he drops the ball, the runner can advance. Catchers now need to have quick reflexes to grab the ball and throw it to the base before the runner gets there.
For this drill, the catcher is in full gear, including his face mask. The coach throws one fly ball after the other in the air as the catcher fields it. The catcher pulls off his mask and catches the pop ups. Throw up about 7 to 10 fly balls so the catcher can practice removing his mask and positioning himself to field the ball.
Next, the coach places a runner at second base. The coach stands between the pitcher’s mound and home and throws fly balls behind the catcher. The coach instructs the runner to hold at second until the catcher either fields or drops the fly ball. On a missed fly ball, the runner heads to third and slides, while the catcher retrieves the ball where it dropped and throws it to the third baseman. The idea is to have the catcher try to throw the runner out on third.
If the pop fly is close to the fence, catchers estimate their distance from it and approach the ball by sliding towards it, glove out. It’s great to be able to slide and catch because it’s safer than running towards the ball and colliding with the fence. Coaches need to practice making them go in multiple directions for the player to make the catch.
Tag Runner at Home Drill
This play occurs a lot in game situations. A runner heads towards home plate, sliding into the plate and the catcher tries to tag him out. Catchers need to be in a good position to have success with this play.
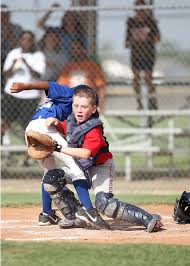 When a runner tags and approaches home, the catcher places his left foot in front of the plate. The key is that the catcher holds onto to the ball tightly in his glove so it doesn’t get jarred loose upon impact with the runner. Positioning of the body is also key, and catchers should practice collapsing on their left knee to be in tagging position.
The coach has a runner on third run towards home. Lob a baseball to the catcher and have him practice securing the ball in his glove as the runner slides into the plate. To avoid injuries, coaches could have each member of the team run from third to home so each player slides only once. Also, since this is not a real game situation, the runners don’t need to slide into home at full speed, which can also cause injury.
The focus is on the catcher, positioning his left foot in front of home, and tagging the runner out while on his left knee. It’s not suggested to combine a runner sliding drill with this catcher’s drill, since the Tag Runner at Home Drill works on the catcher’s skills.
Force Play at Home Drill
This is yet another catcher’s drill that simulates game play in real time. The Force Play at Home Drill is a throwing drill, working on the catcher’s ability to turn a double play after making the play at home. This play works mostly on the catcher’s movements and is designed to improve positioning his body so he can quickly throw the ball to first.
The coach places a runner on third and the first baseman is on the bag at first.
- The coach instructs the runner at third base to run home, then throws the ball to the catcher at home. The couch instructs another runner to run from home to first at the same time the runner from third begins his advance to home plate.
- The catcher places one foot (preferably his left foot) on home plate and sets up like a first baseman to lean into catching the ball.
- The catcher then shuffles his feet and sets up to throw to first base for the double play. Shuffling to the left will gives catchers the better angle for the throw to first.
Catchers should also practice by starting from a crouching position, then getting rid of his mask and fielding the ball the coach throws to him. Repeating this drill often helps the catcher to modify his movements so he can catch the ball tight in his glove, move towards first and throw.
If he starts the drill in a crouch he can learn to stand and stretch to the ball, then throw to the first basemen. Catching and releasing the ball quickly can mean the difference between the runner making it to first base, of being thrown out along with the runner at home for the double play.
Ball Thrown From the Outfield
It’s rare for a ball thrown from the outfield to home plate to be a line drive. Most take a bounce in the infield, sometimes making unpredictable hops. Since the ball will come in on one hop, catchers need to be able to effectively block balls that take erratic jumps so runners won’t advance on an error. Avoiding critical runs scoring is key, and errors should be avoided at all costs.
The coach or an outfield player goes out to the outfield and practices throwing balls into the catcher on one hop. The catcher does not need to start from his crouching position every time, since he’ll have time to remove his mask when the ball is hit. The focus is totally on either getting the ball into his glove after the hop or blocking it with his body.
A more advanced version of this drill is to go through the entire sequence. The coach puts a runner on second base and hits balls to the left, center and right field with either a fungo bat or a regular bat. In this way the catcher can go through his entire sequence of movements, from crouch, then removing his mask and approaching the ball, fielding or blocking it, then trying to tag the runner at home.
If the ball gets past the catcher, it will likely result in the run scoring from second base. Catchers doing the advanced version of this drill can see in real time the impact of their play, noting how important it is not to let the ball thrown from the outfield get past him.
Make Throws With Ball on the Ground
During game play a lot of balls will bounce off the catcher’s body when he blocks incoming throws or he blocks it with his chest protector. The ball falls on the ground in front of him and he needs to get the ball and know where to throw it in a split second.
After the ball bounces off the catcher’s body he needs to recover as fast as possible (Always use the hand! Not with the glove!) and get himself into throwing position. For this drill, the coach stands on the pitching mound and throws balls at the catcher so they bounce off his chest protector. Watch and see how quickly he picks up the ball and gets into a throwing stance.
After throwing at him for a few minutes, simulate a real game situation. Place a runner at home and throw the ball hard to the catcher so he blocks it. The runner advances to first base as the catcher grasps the ball and throws to first in time to beat the runner.
An advanced version of the this drill is placing runners at home, first and second base. Throw a ball to the catcher to block with either his body or the chest protector and have all the runners advance at the same time. Depending on how well he has fielded it, the catcher decides which base gives him the best opportunity to throw out a runner.
The catcher’s first choice should be to third base to get the lead runner. However, catchers should try to throw out at first and second base as well.
General Conditioning
This drill is very simple but effective. Coaches want to rely on youth catchers on game day to have the ability to field every ball that comes to him. The bounce of a baseball changes based on how it bounces, or the condition of the field. The best catchers are effective no matter the state of the field.
- Wet grass: the ball will be wet and it will move slowly. The catcher needs to advance towards it quickly to compensate for its lack of movement.
- Dry playing conditions: In arid conditions, balls move faster. If playing on a day when the temperature is high and the air is dry, the ball moves faster still. Catchers wear gear the other players don’t, so it’s critical that he stays hydrated, preferably with water instead of soft drinks.
- Poorly maintained field: Sometimes rocks and pebbles are found on infield clay and not removed for one reason or another before a scheduled game. Baseballs make unpredictable bounces when they bounce off pebbles, and catchers need to make their best attempt to field them.
These different conditions will affect every player on the field, but will impact the catcher the most. He needs to be able to block balls coming at him from a 180 degree semicircle on his left, in front and to his right.
The coach can practice throwing baseballs from the pitcher’s mound or closer to the catcher. Have im field not one, but five balls at the same time. The object is that the catcher attempts to block them all, not allowing any of the five to pass by him.
Frame the Pitch
This drill involves the catcher receiving a repeated number of balls and keeping his glove in the strike zone. A close pitch can be called either a ball or strike by the umpire depending on where the catcher caught it. This drill is not designed to “cheat” on the call, but instead to hold the glove within the strike zone to make certain that strikes are called.
The ball is thrown into the catcher at an angle by the coach or a player. The thrower is positioned 10 to 15 feet from home plate, standing halfway between the pitcher’s mound and the first base line. The ball is pitched underhanded towards the catcher’s left knee (across home plate). This allows the catcher to practice catching inside pitches. Try throwing 10 times in this direction.
Next, the thrower alternates and places himself between the mound and the third base line. Throw another 10 pitches, aimed at the catcher’s right knee. This helps the catcher work on balls pitched to the outside of the plate.
Eye Patch Youth Catcher Drill
This drill is designed to improve a catcher’s perception of the ball from behind home plate by limiting his field of vision. The drill requires a pitcher, mini wiffle balls and an eye patch.
The catcher crouches in his normal stance behind home plate with one hand behind his back without a glove. The pitcher stands 5 to 10 feet away between the mound and home plate, and fits an eye patch first over one of his eyes.
The pitcher throws underhand to the catcher who attempts to catch the ball with one hand. Repeating throws will only improve his ability to see it coming. Over time, he’ll get better at catching the wiffle ball.
After a few minutes, the catcher switches hands and places the eye patch over his other eye, and puts his other arm behind his back.
Calling Pitches Drill for Catchers
Good catchers call pitches based on his pitcher’s strengths, and not the batter’s weakness. Pitchers and catchers need to spend time during practice by themselves so others can learn about the pitcher’s strengths. The pitcher himself learns to throw where the catcher’s glove is placed. This drill involves only the pitcher standing on the mound and the catcher crouched in his stance behind home plate.
The catcher studies home plate and visualizes it being split into thirds, inside, down the middle and outside. He begins calling pitches and placing his glove horizontal to the plate in each of these three areas.
Pitcher and catcher should spend a full 20 minutes on this part of the drill, and work on it even outside of team practice before games if feasible. The catcher studies the pitches and learns what the best throws are, and what needs improvement. This drill helps both the pitcher and catcher.
The pitcher and catcher should practice throwing and catching fastballs, curves, breaking balls, slow-pitch balls, throws to the inside and outside of the plate. They should also seek input from the coach regarding what kinds of pitches to throw depending on the pitch count.